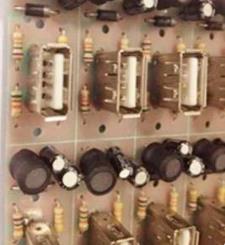
The following is an introduction to the disassembly method of the multi-pin dense pin IC on the circuit board:
.Medical hollow needle removal method.
Take a few medical hollow needles of 8 to 12 gauge. When using the PCB copy board, the inner warp of the needle should just cover the pins of the integrated block. When disassembling, use a soldering iron to melt the pin solder, put the needle on the pin in time, then remove the soldering iron and rotate the needle, and then pull out the needle after the solder solidifies. In this way, the pin is completely separated from the printed board. After doing this for all pins, the integrated block can be easily removed.
.The method of disassembling the tin suction device.

Use a solder sucker to disassemble the integrated block. This is a common professional method. The tool used is an ordinary electric soldering iron with a power of 35W or more. When disassembling the integrated block, just put the heated dual-purpose electric soldering iron tip on the pin of the integrated block to be disassembled, and the solder joint will be sucked into the thin tin device after the solder is melted. After the solder of all pins is sucked, the integrated block will be Can be removed.
.Soldering iron brush with disassembly method.
The method is simple and easy to implement, as long as there is an electric soldering iron and a small brush. When disassembling the integrated block, heat the electric soldering iron first, and after the solder on the pins is melted by the melting temperature, take the opportunity to wipe off the melted solder with a brush. In this way, the pins of the integrated block can be separated from the printed circuit board. This method can be carried out separately or separately. Finally, use sharp tweezers or a small "one" screwdriver to pry off the integrated block.
.Multi-strand copper wire suction and disassembly method.
It is to use multiple strands of copper core plastic wire, remove the plastic sheath, and use multiple strands of copper core wire (short wire ends can be used). Before use, put the rosin alcohol solution on the multiple copper core wires. After the electric soldering iron is heated, put the multiple copper core wires on the pins of the integrated block and heat them, so that the solder on the pins will be absorbed by the copper wires. The upper part of the solder can be cut off, and the solder on the pins can be completely sucked away by repeating it several times. The braided wire in the shielded wire can also be used if possible. As long as the solder is sucked up, use tweezers or a small "one" screwdriver to gently pry, and the integrated block can be removed.
.The method of disassembly by adding solder and melting.
This method is a labor-saving method. The PCBA OEM foundry material only needs to add some solder to the pins of the integrated block to be disassembled, so that the solder joints of each column of pins are connected, so as to facilitate heat transfer and facilitate disassembly. When disassembling, use an electric soldering iron to heat each row of pins with a sharp tweezers or a small "one" screwdriver to pry, and the two rows of pins are heated alternately until they are removed. Generally, each column of pins can be removed by heating them twice.