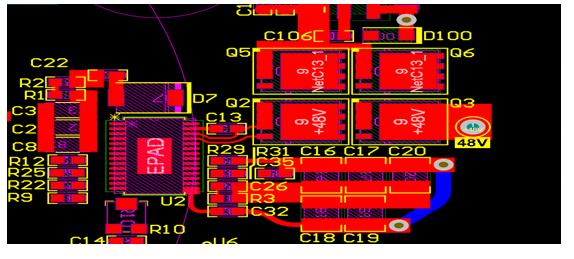
1. Open the PCB design drawing on the computer, light up the short-circuited network, and see where is the closest, the easiest to connect to. Pay special attention to the short circuit inside the IC.
2. If it is manual welding, develop a good habit:
1. Before soldering, check the PCB board visually, and use a multimeter to check whether the key circuits (especially the power supply and the ground) are short-circuited;
2. Every time a chip is soldered, use a multimeter to check whether the power supply and ground are short-circuited;
3. Don't throw the soldering iron randomly during soldering. If you throw the solder onto the solder feet of the chip (especially surface mount components), it will not be easy to find.
3. A short circuit is found. Take a board to cut the line (especially suitable for single/double-layer boards). After the line is cut, each part of the functional block is energized and eliminated step by step.
Fourth, use short-circuit location analysis equipment, for some conditions under specific circumstances, the detection efficiency of the use of equipment and equipment is higher, and the detection accuracy rate is also higher.

5. If there is a BGA chip, since all the solder joints are covered by the chip and cannot be seen, and it is a multi-layer board (above 4 layers), it is best to separate the power supply of each chip during the design, using magnetic beads or 0 ohms Resistor connection, so that when there is a short circuit between the power supply and the ground, the magnetic bead detection is disconnected, and it is easy to locate a certain chip. Because the welding of BGA is very difficult, if it is not automatically welded by the machine, a little carelessness will short-circuit the adjacent power supply and the ground two solder balls.
6. Be careful when welding small-size surface-mount capacitors, especially power supply filter capacitors (103 or 104), which are large in number, which can easily cause a short circuit between the power supply and the ground. Of course, sometimes with bad luck, the capacitor itself is short-circuited, so the best way is to test the capacitor before welding.
In circuit board maintenance, if you encounter a short circuit of the public power supply, the fault is often serious, because many devices share the same power supply, and every device using this power supply is suspected of short circuit. If there are not many components on the board, use "hoe the earth" After all, you can find the short-circuit point. If there are too many components, it will depend on luck whether the "hoe the earth" can hoe the situation.
To deal with the plug-in capacitor on the circuit board, you can use diagonal pliers to cut one foot (be careful to cut it from the center, do not cut all the roots or cut off the circuit board). The plug-in IC can cut off the power VCC pin, and the short circuit disappears when one of the legs is cut. Then a chip or capacitor is short-circuited. If it is a SMD IC, the power pin of the IC can be melted and soldered with an electric soldering iron and then tilted to make it away from the VCC power supply. After replacing the short-circuit components, re-soldering the cut or upturned parts is enough.
There is another quicker method, but a special instrument is used: a milliohm meter. We know that the copper foil on the circuit board also has resistance. If the thickness of the copper foil on the PCB is 35um and the printed line width is 1mm, then every 10mm is long, and its resistance value is about 5mΩ. With such a small resistance value, use ordinary The multimeter cannot be measured, but it can be measured with a milliohm meter. We assume that a certain component is short-circuited. The measured value with an ordinary multimeter is 0Ω. When measured with a milliohm meter, it is about tens of milliohms to hundreds of milliohms. The resistance value of is definitely the smallest (because if it is measured on the two feet of other components, the resistance value obtained also includes the resistance value of the copper trace on the circuit board), so we decided to compare the resistance difference of the milliohmmeter, When a component is measured (if it is solder or copper foil with a short circuit, the same is true), the resistance value obtained is the smallest, then the component is the key suspect. The obstacles can be quickly found by resolving such essentials.