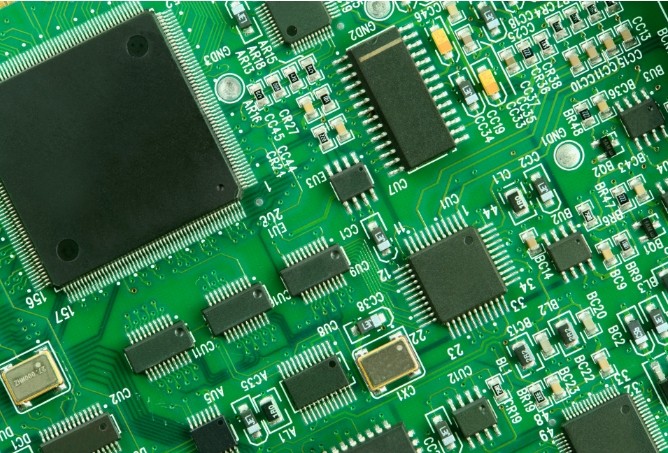
Nowadays, more and more circuit boards use surface mount components. Compared with traditional packaging, it can reduce the area of circuit boards, facilitate mass processing,
and have high wiring density. The lead inductance of SMT resistors and capacitors is greatly reduced, which has great advantages in high-frequency circuits.
The inconvenience of surface mount components is that they are not easy to manually weld.

Surface mount components can be classified into the following categories based on their shape and packaging method:
1. Chip (abbreviated as C): The size is generally 2mm long, 1.25mm wide, and the thickness ranges from 0.25mm to 1.5mm.
Common components include resistors, capacitors, inductors, etc;
2. Quad Flat No leads (QFN): commonly used in integrated circuits, with varying sizes and characteristics of low inductance and low resistance;
3. Ball Grid Array (BGA): The package is smaller than QFN, with many solder balls distributed below it, used for high-density circuit board design;
4. Transistor Outline (TO): It is still a transistor fixed to the PCB through mounting, but its processing and packaging process are different from traditional transistors;
5. Small Outline Transistor (SOT): It is a small transistor that is also fixed to a PCB through mounting.
Welding method
1) Before welding, apply flux to the solder pads and treat them with a soldering iron to avoid poor tin plating or oxidation, which may cause difficulty in soldering.
Generally, chips do not need to be treated.
2) Carefully place the PQFP chip onto the PCB board with tweezers, taking care not to damage the pins. Align it with the solder pad and ensure that the placement
direction of the chip is correct. Adjust the temperature of the soldering iron to over 300 degrees Celsius, apply a small amount of solder to the tip of the soldering iron,
use a tool to press down on the aligned chip, add a small amount of solder to the two diagonal pins, still press down on the chip, solder the two diagonal pins, and fix the chip
in place without moving. After welding the diagonal, recheck whether the position of the chip is aligned. If necessary, it can be adjusted or removed and re aligned on the PCB board.
3) When starting to solder all pins, solder should be added to the tip of the soldering iron and all pins should be coated with flux to keep them moist.
Touch the end of each pin on the chip with a soldering iron tip until you see solder flowing into the pins. When welding, it is necessary to keep the soldering iron tip parallel
to the soldered pins to prevent overlapping due to excessive soldering.
4) After soldering all the pins, wet all the pins with solder to clean the solder. Remove excess solder where necessary to eliminate any short circuits and overlaps.
Finally, use tweezers to check for any solder joints. After the inspection is completed, remove the solder from the circuit board, immerse a hard bristled brush in alcohol,
and carefully wipe along the direction of the pins until the solder disappears.
5) SMT resistive and capacitive components are relatively easier to solder. You can first solder a solder joint, then place one end of the component, clamp it with tweezers,
solder one end, and then check if it is properly placed. If it is already aligned, weld the other end. To truly master welding techniques requires a lot of practice.
Surface mount components play a crucial role in electronic manufacturing, and their quality directly affects the performance and reliability of products.
Meanwhile, compared to traditional plug-in components, surface mount components are more convenient and efficient in the manufacturing and installation process,
which can greatly improve production efficiency and reduce costs.